        |
 |
|||||||||||||||||||||||||||||||
|
Step by step instructions on how I made the first stripes in the photo above and how you can make reproduction stripes today
|
|||||||||||||||||||||||||||||||
 |
|||||||||||||||||||||||||||||||
|
Duplicating original striping
|
|||||||||||||||||||||||||||||||
| On the left: An original Windjammer 3, made between 1974 and 1977. About 75,000 Windjammer 3s were made... about half with optional striping. Stripes were reflective Scotchlite and could be ordered in gold (on the black windjammer, above) red, blue, green and orange. I always thought the orange on silver combination as I used for the turquoise 1975 GL1000 was the prettiest. | |||||||||||||||||||||||||||||||
 |
|||||||||||||||||||||||||||||||
| I wanted to duplicate this fairing so I had a Windjammer 3 and lowers painted silver.
The striping on the Windjammer 3 at the right was applied exactly as I am about to show you: By hand. This is because the "production" striping from our vendor was not yet available. After 30 years, replacement striping is no longer available, either. If you want to restore a Windjammer 3 to its original splendor, here is how to do it: |
|||||||||||||||||||||||||||||||
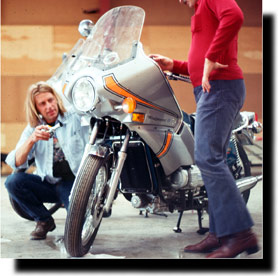
| October, 1975: Prepping for ad shoot in Telluride, Colorado | |||||||||||||||||||||||||||||||
 |
|||||||||||||||||||||||||||||||
| You will need: A set of pre-cut Scotchlite color stripes. I made Plex templates to cut these. Send me a piece of Scotchlite, 24" x 24" and I will be happy to cut a set for you.
You will need 1/8 - 3/16" black car striping vinyl tape. Get it at your car parts store. Also, pick up a roll of 1/4" masking tape, a set of dividers (a cheap pencil compass will do) and an X-acto #11 knife) |
|||||||||||||||||||||||||||||||
| Step One: Apply the Scotchlite stripe in the right place | |||||||||||||||||||||||||||||||
| The only way I know how to do this today is to have another Windjammer 3 to work from. Using 1/4" tape and dividers, I applied guide lines of tape. When you apply Scotchlite, make sure you are at room temp and that you do not try to stretch it. If you overly deform Scotchlite, it will assume a noticeably "Smudged" reflectivity. | |||||||||||||||||||||||||||||||
 |
|||||||||||||||||||||||||||||||
 |
Step Two: Apply black striping tape | ||||||||||||||||||||||||||||||
| Study your original Windjammer 3 carefully and lay on the black tape exactly as it was done. Notice that the tripes are not the same thickness from beginning to end. Again, do not stretch the black striping, either. If you do, over time, the tape will want to creep back into a straighter line. | |||||||||||||||||||||||||||||||
 |
|||||||||||||||||||||||||||||||
| Step Three: Do the other side and the Lowers if you have them | |||||||||||||||||||||||||||||||
| The right and left side were not exactly the same. The stripes are a slightly different shape. In the end, make it look right. | |||||||||||||||||||||||||||||||
| Step Four: Fill in corners | |||||||||||||||||||||||||||||||
| Radius the outside... stick it into the inside. That way, the tape will not be stretched. | |||||||||||||||||||||||||||||||
 |
|||||||||||||||||||||||||||||||
|
Suddenly it is 1975 again!
|
|||||||||||||||||||||||||||||||
|
This Page Updated April 23, 2007
|
|||||||||||||||||||||||||||||||